Hands-Free Data Recording with Python
This blog is part of the enDAQ in Python Series
If you're looking for a more dynamic analysis of your data, or simply looking to automate the manual processes of starting, stopping, and connecting your sensor, taking advantage of our open-source Python libraries can help open new ways to work with your sensors. This post and video was created to help say goodbye to manual data recording and embrace a hands-free experience.
With enDAQ devices necessitating disconnection from a computer in order to record, you may not be able to view your data being recorded in real-time. However, by employing our endaq-device library and configuring your device with a recording limit, you can leverage the swift data processing capabilities of Python to achieve a close-to-live view and/or analysis of your data.
In the walkthrough below, it’ll be important to note that your device and recordings are only accessible if connected to the computer, meaning that if you’re looking to maintain the hands-off approach, your sensor will need to stay connected for the entirety of this process.
Getting Started
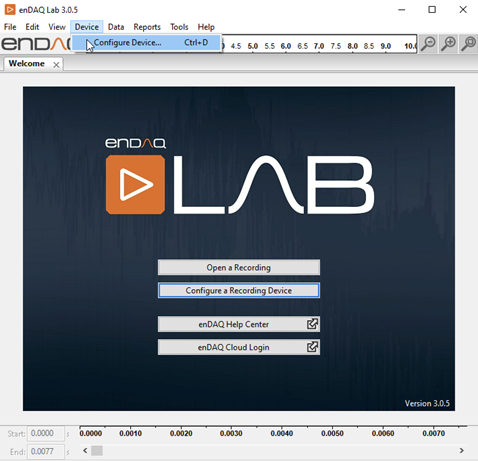
For endaq.device to tell an enDAQ to start recording, the device must be connected and available as a drive each time it is told to start. This means that the device will need to be configured through enDAQ Lab to be able to finish the recording on its own once it is set off and reconnect to the computer.
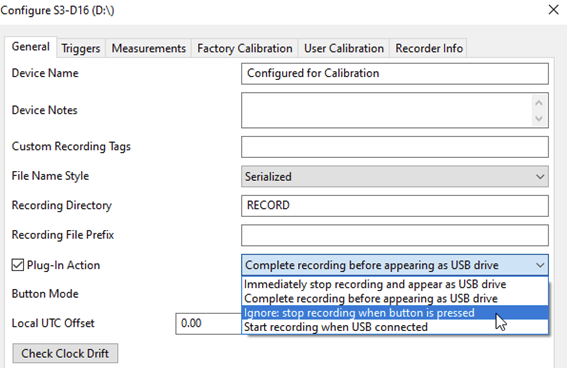
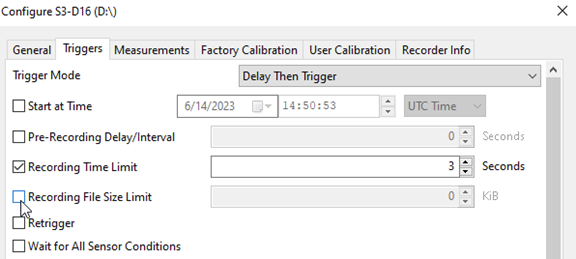
Configuration can be done in enDAQ Lab. The Plug-In Action under the General tab should be either disabled, set to be ignored, or set to complete recording before appearing as a Drive. A time limit or a file limit should be set under the Triggers tab so the device can finish on its own and reconnect, (a button press can also be used to manually stop it if the hands-off approach isn’t necessary).
Once configured, we can address the basic commands in a Python environment that will grab and start a device.
Using endaq.device’s getDevices(), we can get a list of all the devices currently available as drives. Rather than indexing the device you’re looking for out of the list, the device can also be grabbed by providing it a Drive path if it’s known—getDevices(“D:”) will grab the device connected to the D: drive.
The device can be set off using .startRecording(), and the device should disconnect while it records (LEDs should be rapidly blinking) until it reaches the configured limit (in my case, 3 seconds). This means that if we call getDevices() again, we’ll notice the device we initiated is no longer available even though it may still be plugged in. Once the recording time limit has passed, the device should automatically reconnect since it is plugged in and no longer recording and should then show up with .getDevices().
To get to the recorded IDE file, the path of the device can be used and combined with the DATA directory where your files land.
In this example, we’ll plan to start recording three times, using a configuration with a 3 second recording time limit, and following each recording we will grab the file by finding the complete path to the new IDE file. The endaq.ide library can then be immediately used to open the recording and access data. To learn about the ways you can process the data from these recordings, check out the other posts in the enDAQ in Python series.
enDAQ in Python Series
This post is part of the enDAQ in Python Series. Feel free to check out my other related posts;
- Intro to IDE's, Channels, and Subchannels - Part 1/3
- Pandas DataFrames - Part 2/3
- Applying Transforms to Your Data - Part 3/3
- Recording Data Hands-Free